
WordPress & Web Development Articles
From beginner fundamentals to advanced architecture, discover step-by-step guides, screencasts, and code snippets.
How to Customise Frontend Dashboard Templates
The Frontend Dashboard WordPress plugin templates can be easily customise by creating a Folder in your Theme or Child Theme and copy the respective files from the Frontend Dashboard and its addon and paste the file along with Folder structure in your Child theme. Create a folder name fed-templates in your theme or child theme We are going to customise the Login page of Frontend Dashboard template Go to wp-content | plugins | Frontend Dashboard | templates | login Copy the unregistered-user.php Paste it in your theme or child theme under new created folder fed-templates along with the directory structure of unregistered-user.php file ( login ) So the theme or child theme will be like wp-content | themes | YOUR_THEME_OR_CHILD_THEME | fed-templates | login | unregistered-user.php Now are you free to edit the unregistered-user.php as per your requirement
How to setup Frontend Dashboard Social Chat
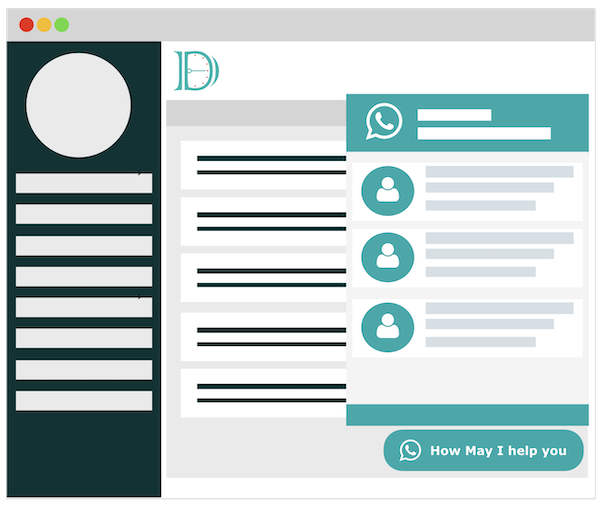
How to setup Frontend Dashboard Social Chat WordPress plugin. Please login into wp-admin | Frontend Dashboard | Social Chat Configure your settings in Frontend Dashboard | Social Chat | Settings Add the users and their details at Frontend Dashboard | Social Chat | Users To change the chat window content, please go to Frontend Dashboard | Social Chat | Layout Do save

How to get Stripe Publishable key and Secret Key
Visit https://stripe.com/ and Signin using your credentials
 Click Developers in Left Menu
 Click API Keys
 Select the View Test Data for Testing Keys and unselect for Live Keys
 Copy Publishable key and Secret key Paste it in Wp-admin | Frontend Dashboard | Payments | Payment Gateway | Stripe | Sandbox Publishable key and Sandbox Secret key for Sandbox and Live Publishable key and Live Secret key for Live key Click Submit
How to Sort Frontend Dashboard Menu
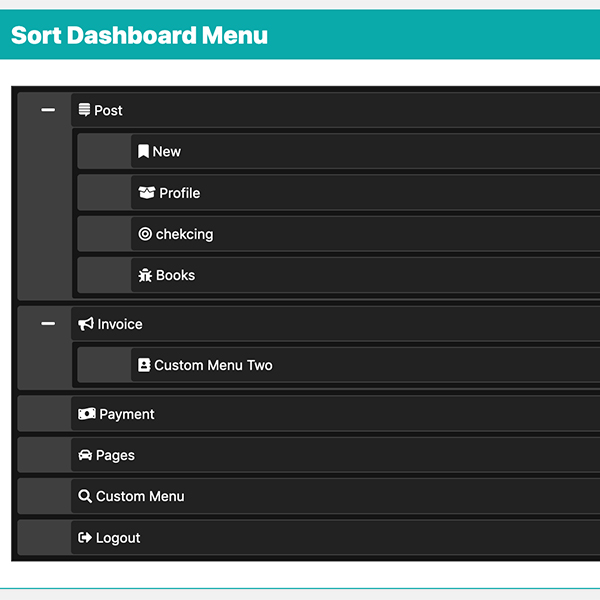
To Sort a Frontend Dashboard WordPress menu, please visit your WP Admin section. Go to Frontend Dashboard | Dashboard Menu In Top Right corner you can find a button Sort Menu, click it. Now you can sort all the menu types like User Profile, Post/Custom Post, Custom Menus Sorting can be done upto one sub-level.
How to Translate Frontend Dashboard
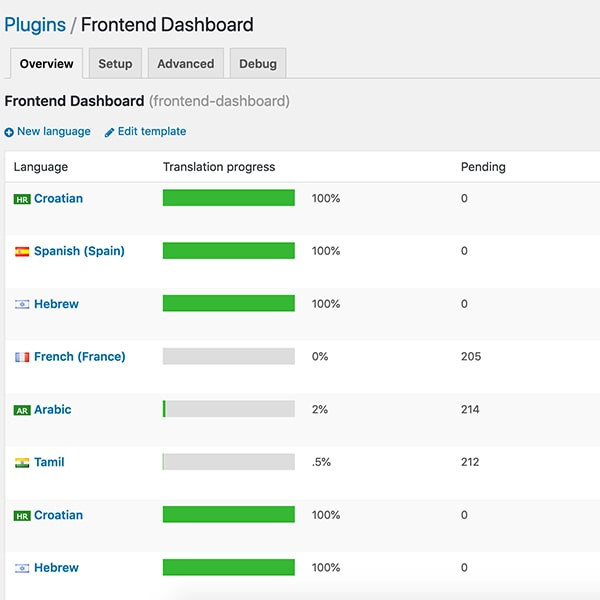
With the help of Loco Translate, we going to Translate Frontend Dashboard WordPress Plugin. Install the Loco Translate WordPress Plugin (Path : WP-ADMIN | Plugins | Add New | Search: Loco Translate) Go to Loco Translate Plugins (Path : WP-ADMIN | Loco Translate | Plugins) Click Frontend Dashboard under Bundle Name Select your language from the list available or click New Language Choose a Language from the List Choose a location, Custom selection would be default. Click Start Translating Select the Source text in the list Add the respective Language translation texts. Click Save. Now you can able to see the translation text to your local language. Please check whether you have selected the respective local language from Settings (Path: WP-ADMIN | Settings | General | Site Language)
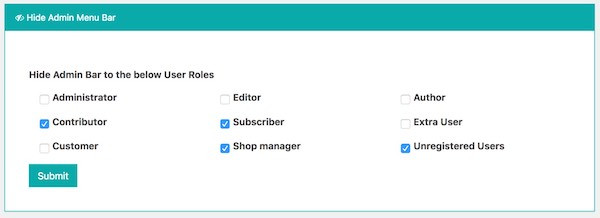
How to hide admin menu bar in Frontend Dashboard
The Admin menu bar can be hidden in Frontend Dashboard based on the user roles. Make sure you have installed Frontend Dashboard Templates WordPress plugin to follow the below step Go to Admin Dashboard | Frontend Dashboard | Frontend Dashboard | User Profile Layout | Hide Admin Menu Bar Select the necessary user roles to hide the WordPress admin menu bar, including Administrator and Unregistered users Do save. Now the Admin menu bar will be hidden for the selected user roles.
How to add profile picture in Template 1
Navigate to Frontend Dashboard | User Profile | Click Add New Extra User Profile Field Make sure you have installed and activated the Frontend Dashboard Extra plugin Click File icon and add the respective details Click save Navigate to Frontend Dashboard | Frontend Dashboard | User Profile Layout | Settings | Change Profile Picture | Select the previously added field name in 3 Click Save Now you can able to see the field name with file upload option in template section. Once the user upload the picture and refresh the page, then the profile picture will be get automatically update.
How to install Frontend Dashboard Templates
Download the Frontend Dashboard Templates from Add-ons Upload and install the plugin Navigate to Frontend Dashboard | Frontend Dashboard | User Profile Layout | Settings Upload the logo and customise the logo size Change the Template Model to Template1 Navigate to Frontend Dashboard | Frontend Dashboard | User Profile Layout | Colours Change the colours to match your theme Navigate to Pages | All Pages | Dashboard Page Edit the Dashboard page where you have added [fed_dashboard] shortcode text Change the Page Attribute | Template to FED Layout 1 Publish the page. You can even add the Widget in the Right sidebar of the template Navigate to Appearance | Widgets Drag and drop the necessary widget into FED Right Sidebar.
Banner Upload Wordpress Plugins
Banner Upload Wordpress Plugins These days all WordPress website owners tend to add banners to their sites. Of course, some type of coding knowledge is needed. To upload a banner to a WordPress site can be easy if you have a bit of coding skill. But without the skill, you might spend so much time trying to upload it the way you want. This is why BufferCode kicks in with the best-precoded plugins that you can use immediately. All you need to do is just download the plugin and install it. How do I install the plugin? Installing the WordPress banner plugin takes a few minutes. You will be able to download the file from our site. Login to your WordPress backend. Scroll down to plugin then click add new. Click on upload plugin then choose the file you've downloaded from our site. Upload that file and don't forget to activate the plugin. Once everything is installed you will be able to add your banners instantly.
How to show pages content in Frontend Dashboard menu
The Frontend Dashboard Pages Add-Ons convert the Frontend Dashboard menu item into page content. Go to Admin Dashboard | Frontend Dashboard | Dashboard Menu Select the custom menu or add new menu Enable the “Show pages for this menu item?” Then you can see the list of Pages available in your website. Select the appropriate page. Do save. Then you can see the page content inside the created Frontend Dashboard menu.

How to add Captcha to Frontend Dashboard
Captcha protects the website from bot registration and login with high security. To add Captcha in Frontend Dashboard, please visit https://buffercode.com/plugin/frontend-dashboard-captcha to download the Plugin and install it in your WordPress website. Go to Admin Dashboard | Frontend Dashboard | Frontend Dashboard | Captcha Fill the Site and Secret Key [ You can get the keys from https://www.google.com/recaptcha/admin ] Select the page you want to show the Captcha like either in Login or Register or Both. Do save. Now the captcha will validate the Register and Login for Bot.
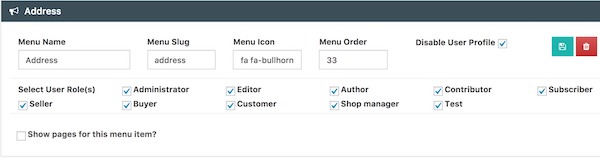
Disable Frontend Dashboard Menu based on User Role
How to disable Frontend Dashboard Menu and User Profile Menu based on User Role. Please go to Frontend Dashboard | Frontend Dashboard | Dashboard Menu Select the respective menu’s Select User Role(s) and change it as per your requirement to disable the Frontend Dashboard menu. Similarly, select the respective menu’s Disable User Profile Save the settings.